Bathroom Wainscoting: Height, Materials, and Moisture
Wainscoting belongs in bathrooms. It protects the lower wall where splashes and scuffs happen, wipes clean, and makes a small room feel finished. It fails only when it is installed like a dining room wall: wrong material, wrong height, unsealed edges, no fan. This guide covers bathroom wainscoting height, the materials that survive humidity, where to stop it, and the details that keep it looking new.
How high should bathroom wainscoting be?
42 to 48 inches is the bathroom standard, higher than the 32 to 36 inches used in dining rooms. The reason is practical: a typical vanity top sits at 34 to 36 in, its backsplash ends at 38 to 40 in, and a toilet tank tops out around 30 to 32 in. A cap rail at 42 in or above clears all three, so it runs level around the room instead of colliding with the backsplash. In a half bath with no tub, 36 in works fine.
- Meeting a tiled tub surround: set the cap at the tile height or one course above it.
- Small powder room: taller wainscoting (48 to 54 in) makes the room feel taller, not smaller.
- Towel bars and hooks: a cap rail at 48 in gives you a natural shelf for the bar backer and keeps hooks above the panels.
Once you have a height, the wainscot panel calculator works out panel widths for each wall and centers a panel on the vanity or toilet.
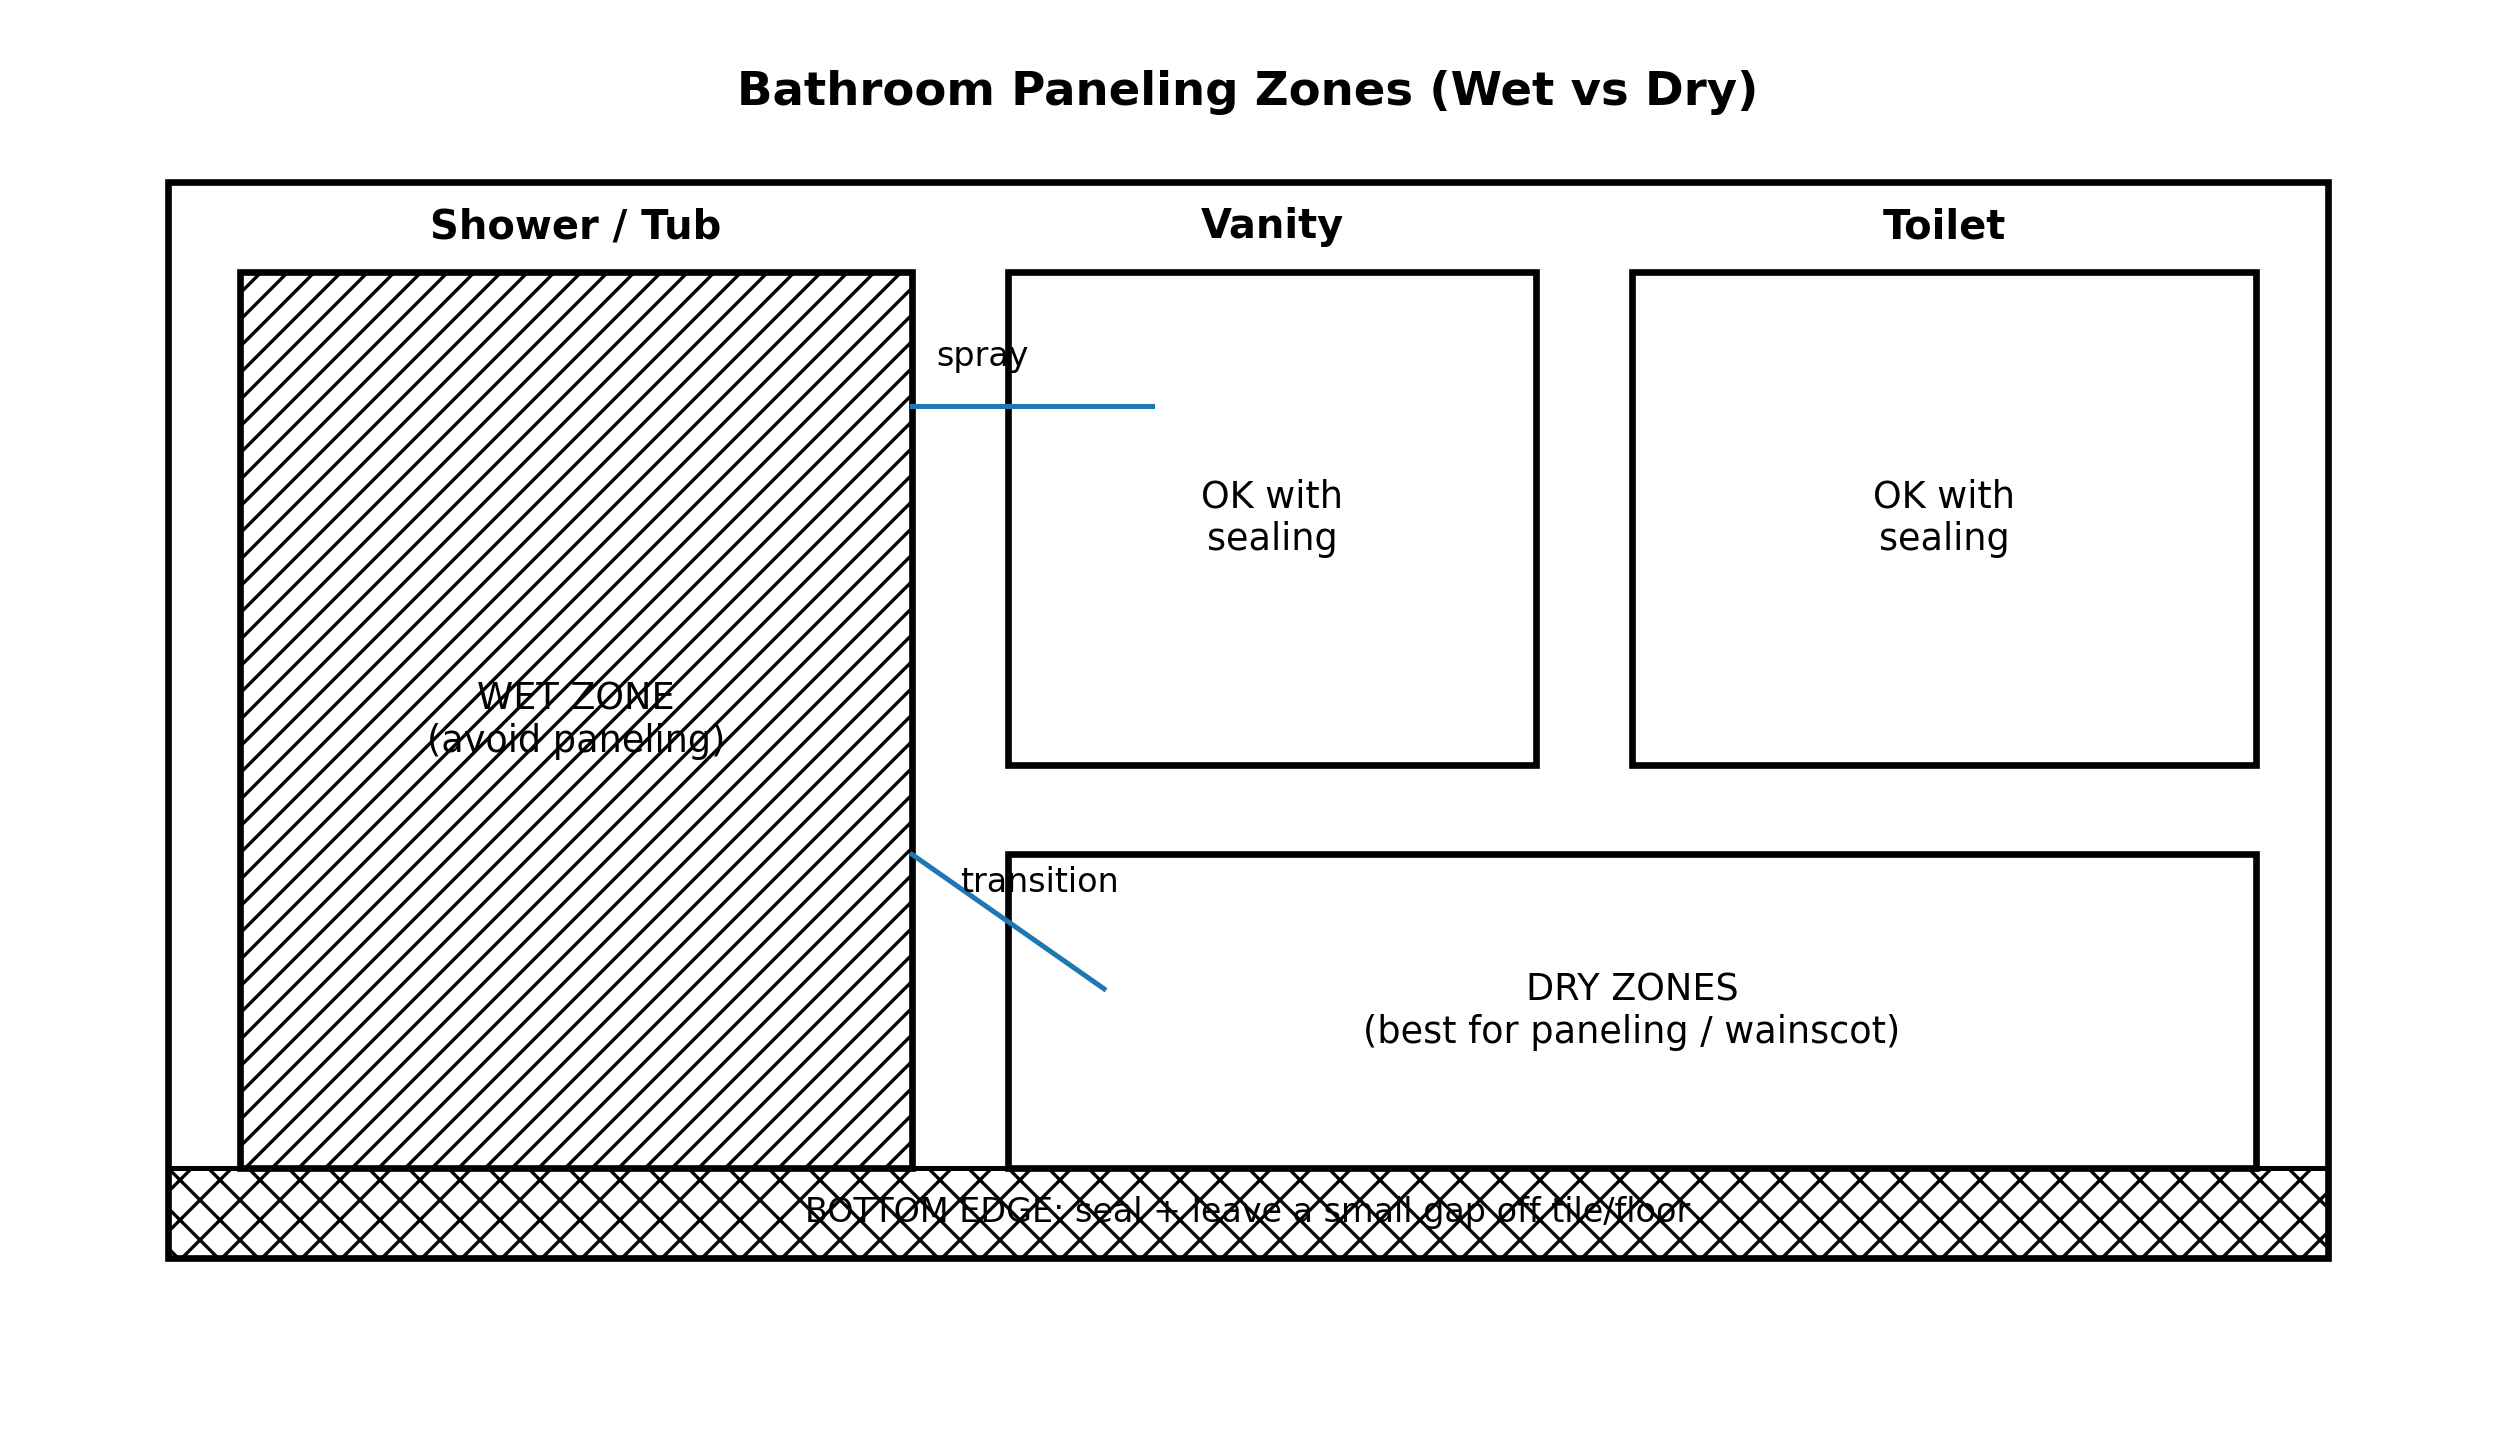
Where bathroom wainscoting works and where it does not
Dry zones: yes
- Any wall outside the shower or tub spray area
- Half baths and powder rooms
- Behind the toilet and beside the vanity, with sealed edges
- The wall opposite the tub, even when it takes occasional drips
Wet zones: no
- Inside a shower or tub surround
- The wall a hand shower can reach
- Anywhere the bottom edge sits in standing water
- Around a freestanding tub without a splash guard, unless in PVC
Best materials for bathroom wainscoting
| Material | Moisture | Cost | Best use |
|---|---|---|---|
| Cellular PVC (beadboard, 1× trim) | Waterproof | $$$ | Walls near the tub, kids' baths, any bottom rail. Paints like wood; use PVC adhesive at joints. |
| Moisture-resistant MDF | Good if sealed | $$ | Panels and stiles in dry zones. Prime every cut edge; hold 1/4 in off the floor. |
| Primed poplar or pine | Good if sealed | $$ | Stiles and rails. Solid wood tolerates the odd splash better than MDF but moves with humidity. |
| Paint-grade plywood | Good | $$ | Flat panel fields. More stable than MDF when damp; seal edges and back where practical. |
| Standard MDF | Poor | $ | Upper panels only, well away from water. Swells permanently when a raw edge gets wet. |
| Tile wainscot | Waterproof | $$$ | The only option that can continue into the wet zone. Cap with a bullnose or a wood chair rail above. |
In bathrooms, paint grade is the smarter system: primer, caulk, filler, and enamel form one continuous skin. Stain grade can work in a powder room, but every seam is a place for moisture to get in. The stain grade vs paint grade guide covers the trade-offs, and the cost estimator prices MDF against solid wood for your wall sizes.
Beadboard vs board and batten in a bathroom
Beadboard is the classic bathroom wainscot, and it is the one style widely sold in PVC, which makes it the safe pick next to a tub. Its grooves collect dust and need a brush to clean. Board and batten installs directly over drywall with no sheet goods, has fewer joints, and reads modern. It suits bathrooms with a flat, smooth wall and a two-thirds height. Framed flat-panel wainscoting sits between the two and is the best match for a traditional house. Plan batten spacing with the board and batten calculator.
Installing wainscoting behind a toilet
The wall behind a toilet is the tightest and wettest dry-zone spot in the room. The clean way is to shut off the supply, drain and remove the tank (two bolts and a supply nut), run the wainscot behind it, then reinstall. If that is not an option, cut the panel to follow the tank outline with a 1/4 in gap and fill the gap with a color-matched silicone caulk. Either way, prime the bottom edge twice and keep it off the floor; condensation from a cold tank drips straight down that wall.
Details that keep bathroom paneling from failing
- Seal every edge before install. Prime cut ends, panel backs where practical, and the bottom of every stile. Raw MDF end grain is how water gets in.
- Hold the base off the floor. Leave a 1/4 in gap above tile and fill it with flexible caulk or a PVC shoe moulding, so the wood never sits in a puddle.
- Caulk to shed water, not to trap it. Seal the top of the cap rail to the wall and the joints between stiles and rails. Do not caulk the underside of ledges where water would pool.
- Use a bathroom-rated enamel. A satin or semi-gloss acrylic enamel or a kitchen-and-bath paint resists moisture and cleans up. Two finish coats minimum.
- Ventilate. Run the fan during showers and about 20 minutes after. If the mirror stays fogged for a long time, the fan is undersized; look for at least 1 CFM per square foot of floor area.
- Prefer PVC for the lowest rail. Even in a mostly wood install, a cellular PVC base rail removes the one part most likely to fail.
Quick checklist
- Is every panel outside the shower and tub spray zone?
- Does the cap height clear the backsplash and toilet tank?
- Are all cut edges and the bottom edge primed?
- Is the base 1/4 in off the tile with a flexible caulk joint?
- Is the finish a bathroom-rated enamel, two coats?
- Will the exhaust fan actually be used?
Bathroom wainscoting FAQ
- How high should bathroom wainscoting be?
- Forty-two to forty-eight inches is the most common height in full bathrooms because it clears the vanity backsplash and the toilet tank, so the cap rail runs uninterrupted. Half baths with no tub or shower often use the classic 36 inches. Match the tile height if the wainscot meets a tiled tub surround.
- Is wainscoting a good idea in a bathroom?
- Yes, in the dry zones. Wainscoting protects the lower wall from splashes and scuffs and is far easier to wipe down than painted drywall. Keep it out of the shower and tub surround, seal every cut edge, hold it slightly off the floor, and run the exhaust fan.
- What is the best material for bathroom wainscoting?
- Cellular PVC beadboard and trim is the most moisture-proof choice and looks like painted wood once installed. Moisture-resistant MDF and primed poplar work well in dry zones when every edge is primed. Avoid standard MDF near the floor or anywhere it can wick water.
- Can I install wainscoting behind a toilet?
- Yes. Either remove the tank and run the wainscot behind it, or scribe the panel around the tank with a 1/4 inch gap and caulk it. Seal the bottom edge carefully; the floor behind a toilet is the wettest dry-zone spot in the room.
- Is MDF okay for bathroom wainscoting?
- MDF can work in dry zones if you prime every edge, especially cut ends, and keep it a quarter inch off the tile so it cannot wick water. Choose moisture-resistant MDF where it is available. Do not use MDF where it will see repeated splashes or standing water.
- Beadboard or board and batten for a bathroom?
- Beadboard is the traditional bathroom choice and comes in PVC for wet-adjacent areas. Board and batten is easier to install over existing drywall and has fewer grooves to collect moisture. Both work at 42 to 48 inches; pick beadboard for cottage or classic rooms and board and batten for modern ones.
Related reading
- Stain grade vs paint grade paneling — why paint grade wins in wet rooms.
- How to install wall paneling — tools, prep, and fastening.
- Wainscot panel sizes — heights by room and ceiling.